


The safest stability ball exercises for seniors start seated: marches, pelvic tilts, and gentle twists build core strength and balance while a wall or chair is within reach. This guide gives you 10 step-by-step moves, a ball size chart, safety rules, and a 2-week starter program.
Core strength is not about a six-pack. Your abdominals, obliques, lower back, and pelvic floor support you every time you stand up from a chair, carry groceries, or step off a curb, and a stronger core supports better balance. Falls are the leading cause of injury among older adults, and the CDC guidelines for older adults recommend balance and muscle-strengthening activities alongside aerobic exercise.
Consult your doctor first if you have osteoporosis, a hip or knee replacement, recent surgery, back problems, dizziness, or a history of falls. These exercises support fitness; they do not replace medical treatment or physical therapy.
Choosing a Stability Ball for Seniors
The right size matters more than the brand. Sitting on the ball with feet flat, your knees should be level with or slightly below your hips, at about a 90-degree angle.
| Your height | Ball size |
|---|---|
| 4’11” to 5’4″ (150–163 cm) | 55 cm |
| 5’5″ to 5’11” (165–180 cm) | 65 cm |
| 6’0″ and taller (183 cm+) | 75 cm |
- Choose an anti-burst ball rated well above your body weight.
- A slightly softer ball (less inflated) is more stable for beginners.
- A ball base or stability ring stops the ball from rolling while you sit.
- Store it away from heaters and sharp edges.
Safety Setup Before You Start
- Place the ball on a non-slip floor or exercise mat, never on a rug that slides.
- Work next to a wall or in a corner, with a sturdy chair beside you to grab.
- Wear supportive shoes with grip, or go barefoot on a mat.
- Keep feet hip-width or wider; a wider stance is more stable.
- Breathe normally; never hold your breath while bracing.
- Stop if you feel dizzy, short of breath, or sharp pain.
Before your first session, simply practice sitting on the ball for 1–2 minutes with your hands on the chair. Once that feels steady, start the exercises.
10 Stability Ball Exercises for Seniors (Core Focus)
Exercises 1–6 are seated, 7–8 use the wall, and 9–10 are for people who can comfortably get down to and up from the floor. Move slowly and with control.
1. Seated Balance Hold
- Starting position: Sit in the center of the ball, feet flat and wide, hands resting on your thighs or the chair.
- Movement: Sit tall, gently draw your belly button in, and hold still while breathing slowly.
- Sets x reps: 3 x 30 seconds.
- Common mistake: Slumping and letting the ball roll back.
- Easier / harder: Easier: Keep one hand on the chair. Harder: Lift your hands off your thighs and cross them on your chest.
2. Seated Pelvic Tilts
- Starting position: Seated on the ball, hands on hips, feet wide.
- Movement: Roll the ball slightly forward by tucking your tailbone, then backward by arching gently. Keep your shoulders still.
- Sets x reps: 2 x 10 each direction.
- Common mistake: Moving the upper body instead of the pelvis.
- Easier / harder: Easier: Make the movement very small. Harder: Add side-to-side tilts and slow hip circles.
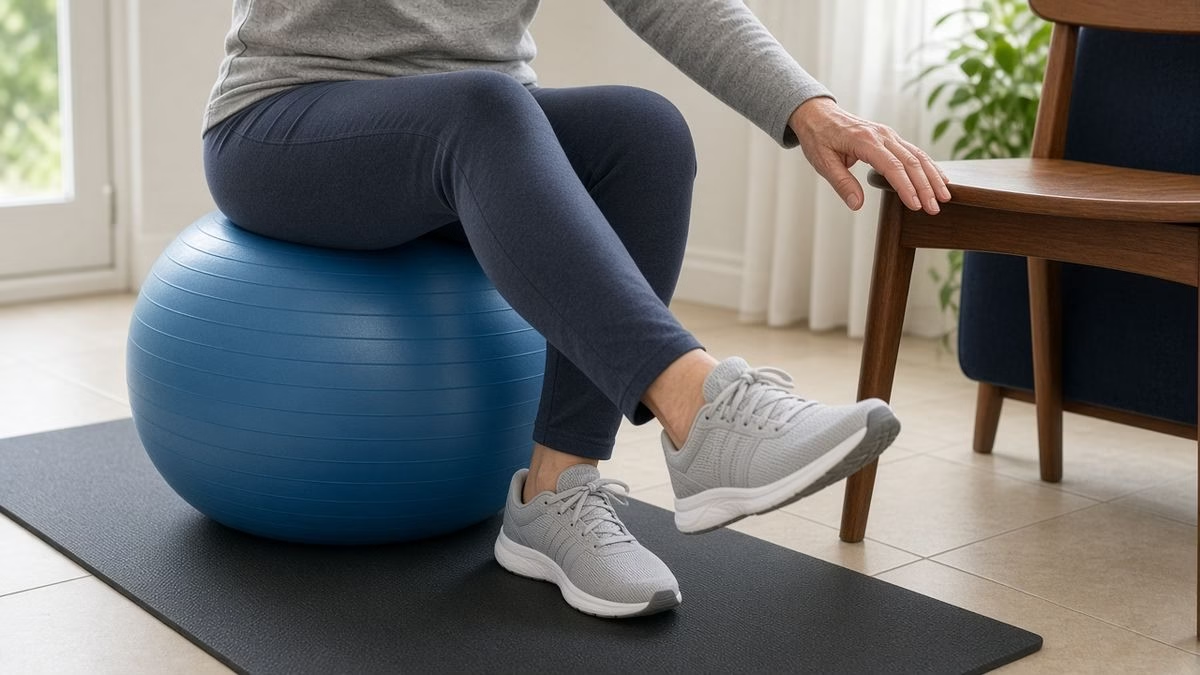
3. Seated March
A favorite from our original guide: it trains balance and the deep core.
- Starting position: Seated tall on the ball, hands on the chair or ball.
- Movement: Lift one foot 2–3 inches off the floor, hold 2 seconds, lower, then switch.
- Sets x reps: 2 x 10 per leg.
- Common mistake: Leaning away from the lifted leg.
- Easier / harder: Easier: Lift just the heel, keeping toes down. Harder: Hold your arms out in front or lift higher.
4. Seated Arm Reach
- Starting position: Seated on the ball, feet wide, arms at your sides.
- Movement: Raise one arm forward and up to shoulder height or higher, lower, then the other arm, keeping your trunk still.
- Sets x reps: 2 x 10 per arm.
- Common mistake: Arching the lower back as the arm goes up.
- Easier / harder: Easier: Raise both arms only to chest height. Harder: Raise opposite arm and opposite foot together.
5. Seated Torso Twist
- Starting position: Seated on the ball, arms crossed on the chest.
- Movement: Rotate your shoulders slowly to one side, return to center, then turn to the other side. Hips face forward.
- Sets x reps: 2 x 8 per side.
- Common mistake: Twisting fast or using momentum.
- Easier / harder: Easier: Twist only partway. Harder: Hold a light ball or 1–2 lb weight at chest.
6. Seated Ball Pass
Kept from our original guide and adapted for chair sitting.
- Starting position: Sit on a firm chair holding a small ball (or the stability ball if light enough) in both hands.
- Movement: Pass the ball from one hand to the other around your waist, then pass it overhead slowly.
- Sets x reps: 2 x 8 circles each direction.
- Common mistake: Rounding the back or holding the breath.
- Easier / harder: Easier: Pass only in front of you. Harder: Sit on the stability ball while passing a small ball.
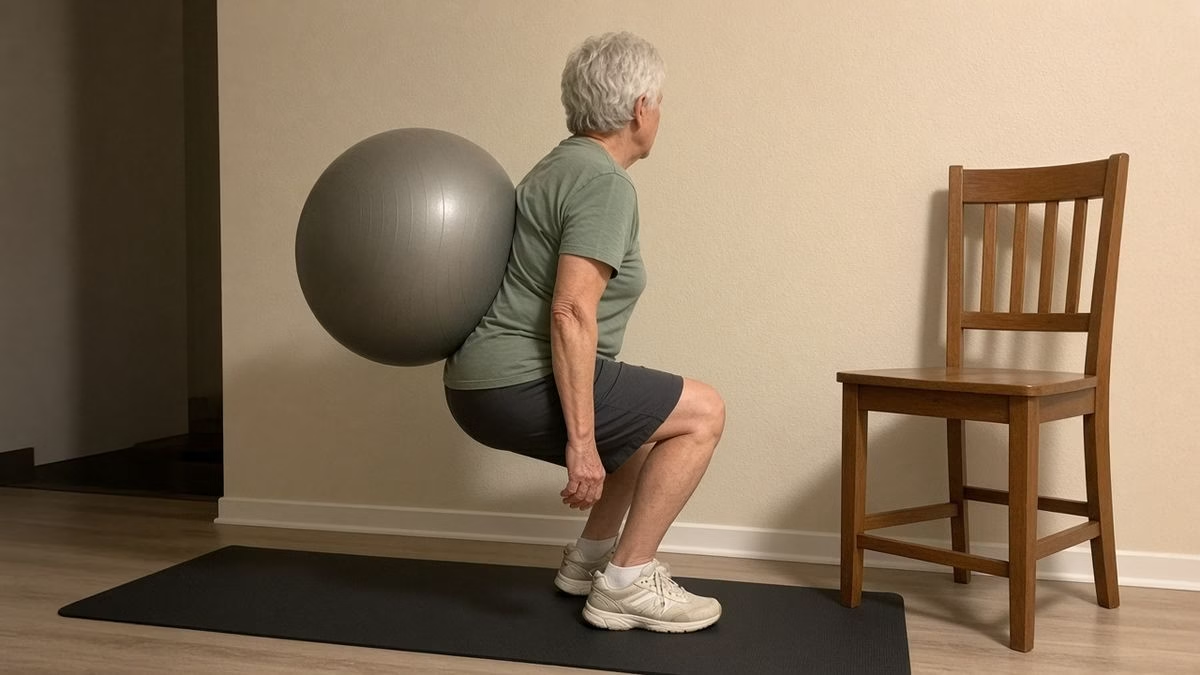
7. Wall Ball Squat
- Starting position: Stand with the ball between your mid-back and a wall, feet shoulder-width and a step forward, chair beside you.
- Movement: Bend your knees and slide down a few inches, letting the ball roll, then press up to stand.
- Sets x reps: 2 x 8–10.
- Common mistake: Letting knees cave inward or going too deep.
- Easier / harder: Easier: Do a quarter squat only. Harder: Hold 3 seconds at the bottom.
8. Wall Plank on the Ball
A safer version of the ball plank from our first guide: no floor, no rolling.
- Starting position: Place the ball against a wall at chest height and stand facing it, hands on the ball, body in a slanted line.
- Movement: Brace your core and hold, keeping head, hips, and heels aligned.
- Sets x reps: 3 x 15–20 seconds.
- Common mistake: Sagging hips or shrugging shoulders.
- Easier / harder: Easier: Stand closer to the wall. Harder: Lift one heel at a time while holding.
9. Ball Bridge (Floor Optional)
- Starting position: Lie on a mat with your calves resting on the ball, arms by your sides, palms down.
- Movement: Squeeze your glutes and lift your hips a few inches, pause, lower slowly.
- Sets x reps: 2 x 8.
- Common mistake: Lifting too high and arching the lower back.
- Easier / harder: Easier: Do the bridge with feet flat on the floor and no ball. Harder: Hold the top for 5 seconds.
10. Lying Ball Pass
- Starting position: Lie on your back holding the ball over your chest, knees bent, feet flat.
- Movement: Lift your legs, pass the ball from hands to knees, lower everything slowly, then pass it back.
- Sets x reps: 2 x 6.
- Common mistake: Lower back lifting off the mat.
- Easier / harder: Easier: Hold the ball and just lift it overhead and back. Harder: Lower arms and legs further before returning.
Summary Table: Stability Ball Exercises for Elderly Beginners
| Exercise | Muscles | Level | Sets |
|---|---|---|---|
| Seated balance hold | Deep core | Beginner | 3 x 30 s |
| Seated pelvic tilts | Lower abs, lower back | Beginner | 2 x 10 |
| Seated march | Core, hip flexors | Beginner | 2 x 10/leg |
| Seated arm reach | Core, shoulders | Beginner | 2 x 10/arm |
| Seated torso twist | Obliques | Beginner | 2 x 8/side |
| Seated ball pass | Core, shoulders | Beginner | 2 x 8 |
| Wall ball squat | Thighs, glutes, core | Beginner–Intermediate | 2 x 8–10 |
| Wall plank on the ball | Abs, shoulders | Intermediate | 3 x 15–20 s |
| Ball bridge | Glutes, hamstrings, back | Intermediate | 2 x 8 |
| Lying ball pass | Abs | Intermediate | 2 x 6 |
2-Week Stability Ball Program for Seniors
Do 3 sessions per week on non-consecutive days (for example Monday, Wednesday, Friday). Each session takes 15–20 minutes, including a 3-minute warm-up of marching in place and shoulder rolls.
| Day | Week 1 | Week 2 |
|---|---|---|
| Day 1 | Exercises 1, 2, 3, 4 (1 set each) | Exercises 1–6 (2 sets each) |
| Day 2 | Exercises 1, 3, 5, 6 (1 set each) | Exercises 1, 3, 5, 7, 8 (2 sets) |
| Day 3 | Exercises 1–6 (1 set each) | Exercises 1–8 (2 sets); add 9–10 only if floor work is comfortable |
After two weeks, keep 3 sessions a week and slowly add time to the holds. On other days, walk or try the routines in our guide to exercises for seniors to do at home.
Why Stability Ball Core Exercises Help Seniors
- Balance: the slightly unstable surface trains the small adjustments that keep you upright.
- Posture: sitting tall on the ball wakes up the back and abdominal muscles.
- Everyday movement: standing from a chair, turning, and reaching all start from the core.
- Back comfort: a stronger trunk can make daily tasks feel easier on the lower back.
- Breathing: upright posture supports relaxed, deep breathing.
The National Institute on Aging recommends combining endurance, strength, balance, and flexibility. Stability ball work covers strength and balance; pair it with walking and stretching. For more ways to stay active, read fit after 50 and our plank exercises for core guide.
FAQ
Are stability ball exercises safe for seniors?
Yes, when you start seated, use the right ball size, work next to a wall or chair on a non-slip floor, and get your doctor’s approval if you have balance or joint problems.
What size stability ball for seniors should I buy?
55 cm for 4’11” to 5’4″, 65 cm for 5’5″ to 5’11”, and 75 cm for 6’0″ and taller. Your knees should be level with or slightly below your hips.
What are the best stability ball core exercises for seniors?
Seated balance holds, pelvic tilts, seated marches, torso twists, and wall planks on the ball are safe, effective starting points.
How often should elderly adults do stability ball exercises?
Two to three short sessions per week, on non-consecutive days, alongside regular walking.
Can I use a stability ball instead of a chair?
Sitting on a ball for short periods can help posture, but use a ball base and keep a sturdy chair nearby; it should not replace a chair all day.